Home Blog Page 30

Best Action Camera Mount Ever For Stable Videos

One of the always talked about subject when it comes to making cycling videos. Which is the “Best Action Camera Mount” that helps in creating neat videos while using adobe premiere pro as a video editor for GoPro footage. I struggled for a long time with the stability of my videos, most of them were pretty shaky and vague until my friend told me about the chest mount for my GoPro camera.

Follow Me On Strava, Click Below
Video editor and chest mount for GoPro

The chest mount is by far the most stable mount for any action camera available in the market. Since the time I started cycling, I was always fond of capturing my rides, not just on Strava but on videos as well. So I started making cycling VLogs on my YouTube channel. I am always on a hunt for “Best Action Camera Mount” for my rides.

Why Is The Chest Mount Best For Making Videos?

When you are cycling or running or a matter of fact doing any physical activity that requires the use of your leg, your chest is the most stable part of your body. Since the movement of your chest is very less, it is by far the most stable part of your body under extreme and intense physical activity. You action camera will be completely stable and the videos will have more stability.

Pro’s & Con’s Of Using Chest Mount Harness

let me list down the pro’s and con’s of using the chest mount harness, so you know what are you gaining and what are you losing.

Pro’s

  • it is damn easy to operate the action camera as it’s within the reach of your hands.
  • Since it’s on your chest, it leaves your hands free, unlike the wrist mount that some of us use.
  • it fit’s everyone whether you are 4 feet or up to 8 feet, the harness comes with multi-adjustable clips.

Con’s

  • You will be stuck with one angle and, you cant aim it at you, or at any other angle for that matter. So limited angle scope!
  • One of the issues with this super comfortable tool is that it’s close to your clothes. So it takes up a lot of external noises like the wind. So if you plan to use it with high speed or at a windy place, the video could be pretty noisy and need some editing at the end.

Summing Up

I use a video editor and mostly now when I upload the videos on my YouTube channel, they are edited. So the external noise part is reduced by the editor. As far as stability is concerned this mount is the best and I love using it on my rides. It is totally your call if you want to capture the POV angle of the front or show different angles.

Check Out My YouTube Channel Video On Chest Mount

Do you have any experiences with The chest harness? Share it in the comments!

Also in case you want to buy this mount for your GoPro camera, just click on the picture below. This is available on Amazon.com.

Music while cycling rules to obey on a ride

Needless to say, I love listening to music on my rides. It’s been over a year, I picked up cycling and I usually go on a ride with my favorite tracks buzzing in my ears. However, I do obey five different music listening rules while riding with my buddies. Music while cycling is good, but only when it’s at a lower volume and kept in check. Also, let me tell you some hacks to listen to music while cycling without getting distracted. Light music while cycling while cycling will not hurt. It does when you crank up the volume and do not pay attention to passing traffic.

Does Light Music while cycling helps?

There might be a difference of opinion here and few people might not agree with me. However I love my music on the ride, it makes me ride happier, faster, and harder. I put in a lot of effort as compared to the time when I am not listening to music. In other words, I think music is an approved drug to enhance the performance of any physical activity. It really works for me!

My 5 Rules Of Music Listening While cycling!

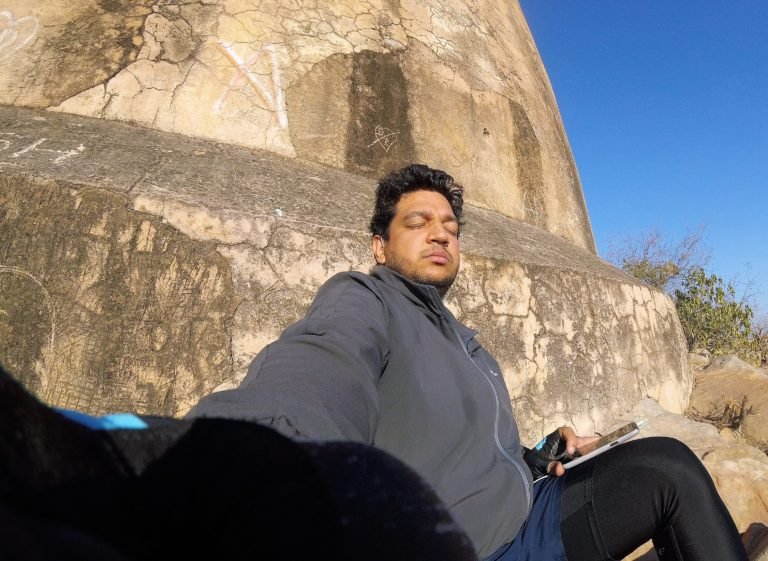
  1. Unless you are on a trainer/treadmill you can use a single earbud buddy. There are many companies that provide a single bud for listening to music. For music junkies who can’t pedal without music, would advise them to use the single earbud. Furthermore, If you have two earbuds take one of them out, especially from the traffic side. Like the way, I use my earbud in the picture above.
  2. There exist a 60/60 rule as advised by a lot of doctors. The idea is to limit the volume of the headphones to 60 decibels and limited to 60 minutes a day. Anything more than this could damage your hearing. Fact: Normal human beings talk between 40 to 60 decibels, and most headphone’s maximum volume is around 105 decibels.
  3. Try if you can use portable Bluetooth speakers instead of headphones. There are multiple places on your bike where you can mount these little speakers. They are loud, but not loud enough to distract you.
  4. There are few events where listening to music while riding is prohibited. It is done for considering specific conditions and environments. So if the organizers say that we are not jamming today, please obey the rules.
  5. When I ride with my friends the intensity of the music is almost nill. Sometimes I take out my earbuds and don’t listen to music even though I love listening to music on my rides. This is because social rides as the name suggests are the rides where you enjoy the company of others. I would not like to be called anti-social just because I am a rude idiot with earbuds stuffed in and not talking to anyone. That’s rude in any language buddy!

Professional’s take on listening to Music while cycling

music while cycling in city and what professionals say about this
Music while cycling in city

“Music is a booster but not with an exercising regime rather it’s a hindrance to the natural flow. Though the rules are perfect only where one has no control over himself. Your favorite music raises the adrenaline to get a better output but compromises on the safety which I would personally say big ‘NO’ to anyone using earbuds to hear while riding. Can be done in a controlled environment but not on Indian Roads”. “An Avid cyclist”

Summing up on hacks to listen to light music while cycling!

So that is my take on “Music Listening Rules” while riding. If you agree then please leave a comment, if you have more points to add, please leave a comment. Lastly, if you do not agree with my 5 rules, even then leave a comment. It is fun to communicate always.

Having said that, I try to avoid music while cycling in city areas. These areas are red zone and jam packed with traffic and you might miss a horn sound or two. So music is ok for me when on the state highways but in city its a no go. Plus I keep the volume in check so that passing traffic is easily heard.

Check out my cycling Vlogs On my YouTube Channel. In case you are traveling and want to transport your bike around India, read my article on transporting bikes in India.

Squats Day With Merida Big 7

I woke up today at 5 AM. The first 20 seconds of me opening my eyes and coming back to the real world were tough. A part of my brain tells me that dreamland was much better and advised my body to get back to bed. I had other plans in my mind. Today was Squats day! Indeed an amazing exercise that is a part of every athlete around the world. This exercise has been ruling the fitness world for ages.

Upon reaching Nahargarh which is my favorite spot to have breakfast in the morning, I had already clocked 28 KM’s.

Squats History

We all have been squatting from our birth. Now ain’t that the truth! We Indians were squatting all our life, until the time modern age came flushing us down to the lazy hole. Yeah, you’re guessing all right. In a few nations, not exclusively do they keep on sitting in a full squat (once in a while called a “third world squat”), however as opposed to sitting for crap, they squat over it.

Misconception

Everybody who does not squat think that this majorly a leg exercise. To be quite honest it is, however it does target other muscles in the body as well. Being a compound movement, i.e. it uses more than one joint to (Knee’s and Hip) to complete. You use a weight like dumbells and this monster movement works out all major muscles in your body and not just your legs. “In short, squats are great and they burn fat a lot faster than any other exercise”

Let The Squats Begin

The place where I do my workout is amazing, you can practically see the panoramic view of the pink city. Mountains on one side and city on the other, the view is enough to motivate you. Let me list down 8 terrific gains from this exercise to make you understand it’s importance.

  1. Squats build your quadriceps, hamstrings, and calves muscles. When you do squats properly it triggers the release of testosterone which is vital for muscle growth.
  2. It makes your body terribly well balanced and with strong muscles, these gains ads on to your overall body performance making your body more effective in real-world situations.
  3. It burns a hell lot of fat, yes and exactly because of this reason this is my favorite exercise. For every pound of muscle gained, you are going to burn 50-70 calories more per day.
  4. As you grow older this exercise id best to keep that strength in your legs to pedal more and longer. Also, they work out your core, stabilize muscles and keep your body balanced.
  5. Weak muscles, ligaments connective tissues results in injury. Squats make these important components of your body stronger thereby reducing the risk of any injury.
  6. As a result of squats, you will run longer, jump faster and pedal more as your leg muscles will be strong. So it has a direct effect on your sports performance. Do Squats!
  7. This exercise will tone your back, abs, and entire body. Doing squats daily showed results which led to a stronger back and a stronger core.
  8. These help in improved movement of feces and regular bowel movement which leads to the elimination of waste. This keeps your body waste free.

How To Do Squats Properly

Now let’s take a look at how to perform this exercise without getting injured.

  1. Do a little warm up, this can include knee raises, running in place, butt kicks, mountain climbers & leg swings. That’s what I do before punishing my legs.
  2. Stand firm with your legs just over shoulder width apart.
  3. Keep your back in a neutral position and knees centered over your feet.
  4. Now bend your knees, hip ankle to take your body lower until you get a 90-degree angle.
  5. Now return to the standing position and repeat 20 times. (Do 2-3 Reps)

Important Tip: “Breathing should be rhythmic and is very important. Breathe in as you lower your body and breathe out when you return to starting position”

Added A Little More Resistance

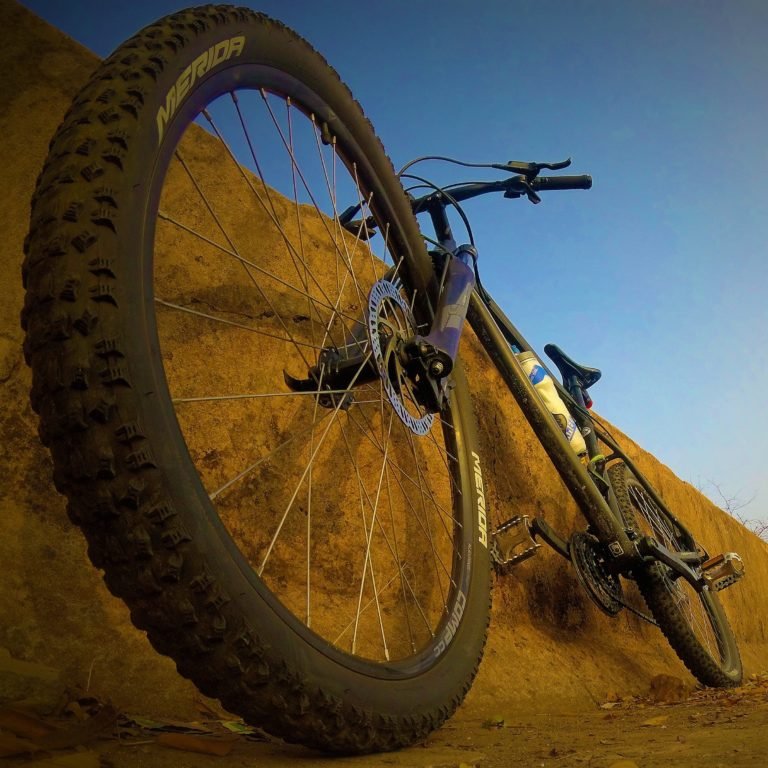
Now what I did was, that I added a 15 KG’s weight while doing squats. My Merida Big 7 weighs a little over 14 KGs. This was enough resistance for me, and I added the same to my squats exercise. It was a little tough, but hey as well know “no pain no gain”. Now you gonna have to properly hold your bike over your head. This is a little risky so, please only try squats if you can hold your bike effectively over your head without any problems. I would also let you know the correct procedure to hold your bike above your head. Check out the video that I made for squatting with a cycle. The link is below!

Squats are fantastic!

After reading this post, you must have got the point that I was trying to make. Include squats in your daily fitness regime to get a stronger body. Reduce fat like a pro and get that toned body that you deserve. All you have to do now is start squatting.

Video On Squats

As you all by now know how I make daily Vlogs, here is what I made for my squat routine. This video is uploaded to my YouTube channel, sharing a link on this page.

If you like the video, give a thumbs up on YouTube and share it with your friends. Any questions please leave them at the end of the page. I will get back to you on your queries.

Major Changes To YouTube Partner Program

YouTube partner program (YPP) has done major changes set to come into force this year. Quite honest the terms now set will allow serious contributors to make quality content. So much bad content was uploaded last year. This led to a wastage of time and I had to dislike a lot of videos. Let us take a look at what things have changed under the YYP.

This is though a good change as only YouTube channels with good content will be promoted. All the unethical ways of YouTube channel promotion will now be of no use. In this article let us go over youtube partner program policies & youtube partner program rules for new creating a new channel. Youtube partner program terms are easy to adhere to, but this is where most new YouTubers make mistakes.

CHECK OUT HOW YOU CAN GET APPROVED FOR GOOGLE AD-SENSE

Reason For Change in YouTube partner program terms

Research done by YouTube shows a lot of channels made a lot of content, however we not able to cross the threshold of 100$.

They just kept on uploading useless content which was not a value-add to YouTube.

As a result of which about 60% of the channels made content not worthy of watching and somehow YouTube algorithms kept’s showing those videos/content under the suggested option.

This is what “Susan” the CEO of YouTube had to say last year for people making content which is not acceptable under YouTube’s guidelines.

What were the rules previously?

YPP did a change in the month of April 2017. YouTube restricted channels to monetize their videos if they did not have 10,000-lifetime views.

However, these rules were very lenient and it failed to have the effect which it should have.

Most of the channels were able to cross the 10,000-lifetime views even when the channels did not have any quality content.

YouTube has now realized that the standard which they ought to have should be a little strict and the channels stats a bit on the higher side.

Thankfully my YouTube channel surpassed that limit a long time back and met the eligibility criteria as per the YPP program.

YouTube channel promotion however, will now be getting difficult. 

Recent Changes In The Rules for YouTube Partner Program

Once YouTube realized that the rule set by them of 10,000-lifetime views is not enough to make YouTube a quality platform for people. They have not done certain strict changes.

As per YPP, firstly to be eligible to monetize the videos, the YouTube channel now must have more than 1,000 subscribers.

Secondly, the channel should have more than 4000+ watch hours in the last 12 months.

Only when your YouTube channel is in accordance with the above two rules, only then you can monetize your videos.

This change would be effective from February 2018.

How To Meet The Criteria for YouTube Partner Program

There is only one way you can meet the YouTube Partner Program criteria, which is to make quality content and follow all youtube partner program rules.

I started with randomly uploading videos and not bothering them about specifics. Over a period of time, I have changed and so has my YouTube Channel.

Always remember it is important to make and upload content regularly. However, the content should be worthy of being uploaded and should be in line with your passion.

For an e.g. we all know that prank videos are the one watched by all and they tend to get a lot of views.

However, this is something that I don’t do, and neither do I have any interest in them.

My interest lies in Photography, Cycling, Travel, and Fitness, and my videos are related to my passion and interest.

Watch the complete video here!

Note: Do the stuff that you really like doing, the idea is not just to make money, but to showcase your talent to the world.

Now, if you have any questions related to the youtube partner program policies please leave them in the comment box. I would love to answer them.

Increase Lung Capacity

Do This One Exercise Daily To Increase Lung Capacity

After I took cycling as one of the inseparable activities of my daily schedule, I have changed a lot. My stamina has increased phenomenally. Now that I have decided that this year, I will do the Ladakh cycle tour, I need to Increase Lung Capacity to an extent that I do not feel breathless at that unforgiving terrain. In this article, I will share a simple breathing exercise to increase your lung capacity.

I now cycle 3 days a week and run for 3 days a week. That’s how I am developing my stamina for this epic life experience this year. Some of you might wonder why am I cycling to Nahargarh almost every day? This is exactly the reason, can’t take off Ladakh from my mind.

Important Tip Before We Begin

Yes, it’s important to breathe correctly, if you don’t there are some major repercussions. Most of you breathe through your mouth, which is not correct. Breathing should be done by the nose, and let me jot down the benefits of it below.

  • When you breathe through the nose, the hairs that line your nostrils, filter out any dust or dirt particles. These particles are harmful to the lungs. My breathing through mouth no such filtration occurs and hence the damage to your lungs.
  • One more important thing happens when you breathe through your nose. The correct level of oxygen and carbon dioxide is maintained. Unlike when you breathe through the mouth, there is a disbalance of oxygen and carbon dioxide which leads to hyperventilation. (Heavy and fast breathing)

The Exercise To Increase Lung Capacity

This exercise which I am going to demonstrate has worked magic for me. I just do this one exercise daily, and I have seen phenomenal results. You can do this exercise while standing up or sitting down. I am going to elaborate on the points mentioned below.

  1. Stand upright with your back arched
  2. Exhale all the air from your lungs, you can exhale through the mouth, that’s ok.
  3. Breathe in slowly through your nose, filling your lungs as much as possible.
  4. Now you need to hold your breath for at least 10 seconds or more, depends on your capacity.
  5. Slowly exhale through your nose.

If you do this simple breathing exercise daily, and at least 20 to 30 times, you will see a substantial Increase in Lung Capacity. Let me show you how it’s done, please have a look at the video below. This video is available on my YouTube channel.

If you have any questions related to this article, please leave them at the end of the page.

Check out my article on calisthenics workout for beginners.

Calisthenics Workout For Beginner

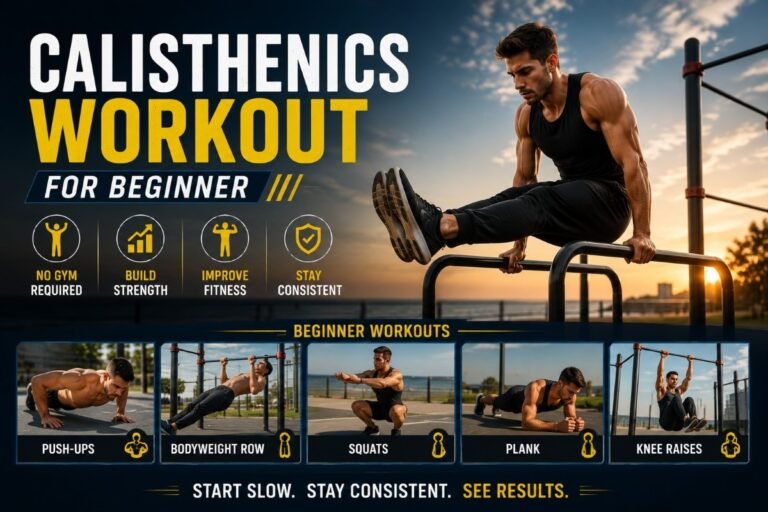
In my last article “What is calisthenic workout”, in the category of health & fitness I defined Calisthenics Workout, it’s merits and demerits. In this article, I am going to take you through different calisthenics exercises that you can do anywhere. You just need a little space and about 30 minutes of your time.  This workout routine is for beginners only. Also, I would keep on documenting my progress and results with due course of time.

Since I like cycling a lot, which is an amazing cardio workout and also helps me in traveling to far off places. I have decided to club my calisthenics routine with my cycling schedule. I ride to Nahargarh almost every alternate day in Jaipur. You can watch all my videos on my youtube channel which I made during my ride to Nahargarh!

Now let’s come back to calisthenics. There are a variety of exercises that you can do under calisthenics workout, however, as a beginner, we would do limited exercises with limited repetitions and limited sets. So Let’s begin!

Check out my article on increasing your ling capacity.

Beginners Calisthenics Workout

I have also just begun calisthenics workout, and one of my friend who is, in turn, the master of these kinds of workouts routines is helping me out. This workout which I am sharing with you all is to be done only 3 times a week, in sets of 3 only. Always remember don’t overstress yourself with too much workout. Too much workout can lead to injury and fatigue. We don’t what that, so let’s keep it simple, easy and let’s try to progress slowly.

Below is what we are going to do for one week, and then we would change the intensity of our workout routine, by changing intensity I mean we would increase the repetition.

  1. Pushups (30)
  2. Forward Lunge (20 per side)
  3. Lateral Lunge (20 per side)
  4. Plank (One Minute)
  5. Squats (20)
  6. Crunches (20)

Do these 6 basic exercises for a week, and you will see the difference yourselves. Let me explain these exercises in details so that you do not make a mistake while doing them. Always remember more than exercises, the correct posture/way is important. If the way of doing the workout is not correct, wrong muscle group will be targetted and you will not get the desired results.

Pushups (Total 30, 3 types)

Ever watched those Hollywood war flicks. Ever seen those nasty drill instructors turning the trainee’s life hell by punishing them with pushups. This basic calisthenics exercise can be done anywhere, without any types of equipment. All you need is your body weight, which always is with you. Now at the starting of our training regime, I would do 30 pushups a day. Three different types of pushups. All that you have to do is change the position of your hands and by doing so different muscle groups would be targetted.

Normal Grip Pushups (10 Reps)

Look at the picture below. This type of pushups distribute your body weight proportionately and target your chest, shoulder, and triceps.

Wide Grip Pushups (10 Reps)

Look at the picture below. This is a bit difficult and the muscle group that it targets is your chest. One of my favorite exercise.

Diamond Shape Grip Pushups (10 Reps)

This grip pushup is for targetting triceps. All you have to do is make a diamond with your hands and do the pushups. Take a look at the picture below for reference.

Forward Lunges (20 reps)

One of my favorite exercise. Why? Because it targets a lot of muscles like core, hips, hamstrings, quads, glutes, and the hard-to-reach muscles of the inner thigh. Do the 20 reps of this exercise.

Lateral Lunges (20 Reps)

An amazing exercise which works on your Quads, Glutes, Inner thigh. Advance out to one side and move your body weight over your right leg, hunching down to a 90-degree point at the right knee. 

Plank (1 Minute)

This is a boon to your core. If you do this regularly your core muscles are going to be tough as a stone. Not only does it helps you to sculpt your body, but also helps you in improving your posture. We would do two types of plans here, forearm plank and side plank as shown in the picture below.

Squats (20 Reps)

I just love squats. The reasons are many. Squats help in burning fat, strengthening muscles, and is a great way of exercising the whole body. Most you might think squats to be legs exercise however it’s not. This exercise is a compound movement which involves your knees and your butt joints. Stand straight, no bend or arch in the back, face straight and push your butt back words and then go down. The important point here is that squats should start with your butt going back and not directly going down on your knees. Take a look at the picture below.

Crunches (20 Reps)

A phenomenal exercise for your core and losing belly fat. Lie down on a flat surface, with your knees bend. If you have a chair or some stable platform keep your legs on it and bend knees at 90 degrees. Traditional way if doing it is to take your hand behind your head. I don’t do that because of the fact that you might pull your head upwards, which is not advised. What I do is, I raise my hands straight pointing up, and then raise your shoulders and lift your upper body. Now do not try to use the momentum to complete your reps. When you do crunches the idea is to do this very slowly. Lift your shoulders up slowly and bring your body down slowly. You should start feeling the tension in your core muscle group after few sets. Take a look at the picture below.

Now that you have read the complete article about how to start practicing calisthenics as a beginner, I would urge you to watch the video that I made for this workout routine. This video is on my YouTube channel. Also If you like to leave comments, please do so at the bottom of the page.


What is Instagram ShadowBan?

We all love the likes on our posts on social media as much as comments. Be it Facebook or Instagram. We do almost anything to get more people to like our posts, on these platforms. I use it for my cycling posts. We use creative and user engaging content, use hashtags, promote our posts by paid advertising, and do whatnot. I have a healthy Instagram and Facebook profile. Last week while posting an image on Instagram, as usual. I was using a few hashtags which I used earlier and to my surprise, my post engagement was too low as compared to the previous posts. Furthermore, the engagement was so low that I thought if there was something wrong with Instagram or what? I was a victim of the Instagram shadowban. Also, we will take a look at the Instagram shadowban tester. This is also referred to as shadowban checker Instagram.

History & Cause of this Instagram glitch

This term shadowban is not new, it has been in the social world for quite some time and was first used by Twitter. Twitter was blocking users on a temporary basis is found that user was spamming or posting unwanted tweets which do not comply with twitter policies. The meaning of the shadowban is to block a user on the social platform without letting the user know that the profile is being shadowbanned. Spooky! Isn’t it!

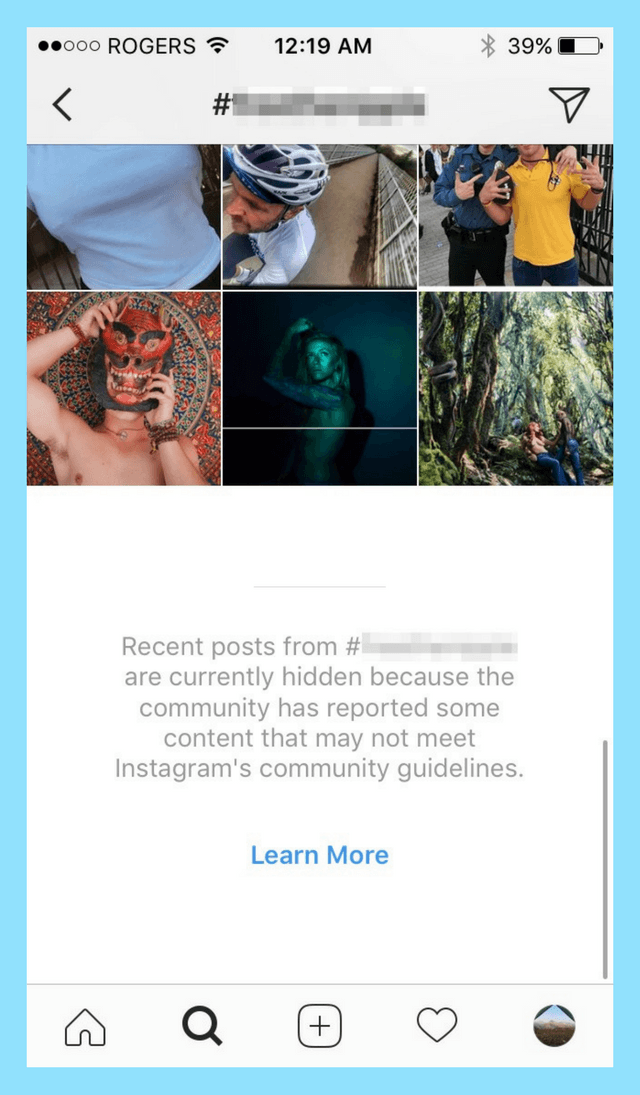
The causes of the Instagram shadowban can be numerous, however, major would be the user being spammy, inappropriate, or even abusive. Now what is interesting is that even the non-spammy behavior of a lot of users has landed them in the shadowban basket. Look at the statement by Instagram on this issue.

Let’s see what are the contributing factors which trigger the shadowban of a profile on Instagram. You do not want to lower your post engagements now, do you?

Do not use broken or banned hashtags

With millions of user daily who posts uncountable content on Instagram, it is very difficult for them to track which user is posting what. However, at times when the algorithm of Instagram comes to know that there is an occurrence of spam due to any specific hashtag, and it simply bans the hashtag.

Instagram ShadowBan

Do not use any broken or banned hashtags. Even if you use one banned hashtag, the Instagram algorithm will block all your hashtag in a post. This means your post will not appear in the search for other hashtags that you embedded in your post. Furthermore, this will bring down your engagement significantly.

Using Softwares For Auto Post

Are you using any software for auto posting your content? Instagram now has implemented strict policies about 3rd party software. Instagram refreshed its policies to be harder on bots, including bots that auto-like, auto-remark, and bots that increase your followers. On the off chance that you utilize any sort of 3rd party software or bot-like programming, there’s a possibility that a) Instagram knows, and b) you will be shadowbanned. Conclusion “Do not use it”!

Limit your activity

Avoid going all bonkers on Instagram. Limit your likes, comments, and follow. If you suddenly start liking all the posts, start commenting like there is no tomorrow, and follow 50 accounts and suddenly unfollow 30. This makes Instagram bots suspicious and they will ban you. Try to subtle.

Be in the good books

Instagram does look at the people reporting your profile, however, they would take action only after investigating. They will see if the ban reported is violating Instagram policies or not. If yes, your account might get banned permanently or might get shadowbanned.

How to check if your profile is Shadow Instagram Banned?

Use Some Other Account To Check

Take help from your friend. Ask your friend to unfollow you and then try to search the hashtag that you embedded in your post. See if your post comes up in recent posts. If it comes you are all good.

Use A Instagram Shadowban tester or checker tool

I am not very sure of the accuracy of these Instagram shadowban tester or checker tools. However, these tools have worked for me so far without any issue. For a few of my friends, they did not just click. Just key in your post link or your user handle on Instagram and the tool would tell you if you are doing alright. Click here to check out this online free tool.

How To Come Out Of Instagram Shadowban or this Instagram glitch?

  • Stop using the banned hashtags or broken hashtags, the good thing about this shadowban is that this is not permanent, it comes and normally goes within 2-3 weeks for most of the users.
  • Stop using bots or auto response software, work on Instagram only. Using one of those good-looking 3rd party software is going to make your life tough, nothing else.
  • If you think something is not right and you find yourself a victim of shadowban, report it to Instagram. To do this, simply navigate to your Instagram profile and select the “cog” icon in the top right-hand corner of the screen. Next, scroll down and select “Report a Problem.” A pop-up should appear with a few options. Select “Something Isn’t Working,” and write a short message that clearly describes the issue.
  • Take a break from Instagram, and let it be cool down for a few days. Furthermore, things will be coming back to normal, sooner than you would expect.
  • Do not forget to check the status of your profile on the Instagram shadowban tester or checker tool when you are getting less engagement.

Furthermore, If you like what you read and you do not want to be the victim of shadowban, please keep in mind these things. Share the article & the video with someone who you think might have this problem. Watch the video below which I made for Instagram show ban or shadowban.

Leave a comment at the end of this page and I will get back to you. You can also check my blogging section where I help people to set up a blogsite. 

If you would like to contribute a little to help me keep up this blog. Please shop on Amazon by clicking the Kindle advertisement below.

Chulgiri Digamber Jain Temple in Jaipur

Chulgiri Digamber Jain Temple is beautiful yet a difficult place to reach if you are riding a cycle. This is one of the iconic places on the outskirts of the pink city, Jaipur Rajasthan India. If you are going to this place on a cycle, you better be fit and healthy. The incline is steep and even in the low gears to conquer this incline, you will have to sweat a lot.

In case you need more understanding of gear shifting on cycle, read my post under the category cycling.

I hate waking up early in the morning, especially in winters. It’s less than 10 degrees in Jaipur these days. Winter is in full swing, with temperatures going down as less as 5 degrees in the morning at some places in Jaipur.

“I have been to Chulgiri Digamber Jain Temple before and it was fun then, well what has changed now?”

The rules have become strict now, than ever before. We were advised to keep our cameras inside and not to click any pictures because few young guns fell while taking a selfie some weeks back. You cant even click pictures with our cellphones on the way to the temple.

“I mean really? This is exactly what happened”

I got up at 5:30 AM as we had to assemble at our meeting point. Three riders joined me at an iconic place of Jaipur, Birla Temple. My friends Saurabh, Nimit & Shreyansh, were all excited to be on top of Chulgiri hill. Primarily because Saurabh and Shreyansh were cycling Chulgiri Digamber Jain Temple for the first time, whereas I and Nimit have done Chulgiri hill ride a few times before.

Route To Chulgiri Digamber Jain Temple

We took JLN road and took a right turn from Trimurti circle and went riding via raja park and transport Nagar. Most of the way till “Ghat Ki Gunni” tunnel is inclined, which is a good workout flat road. From the tunnel, it’s quick decline, and all you have to do is sit on your bikes and enjoy. This leaves you right at the foothills of Chulgiri Digamber Jain Temple mountain.

The Way Up

The way up is unforgiving, I mean cyclists with little or no experience have no chance of riding to the top of this hill. Even average cyclists have to stop and then catch their breath and then move further. This is because the incline of Chulgiri Digamber Jain Temple hill is very steep. This is by far the steepest ride trail I have seen in and around Jaipur city. You would be surprised to know that the length of this stretch is only 2 KM from the Jaipur Agra highway.

STRAVA Details

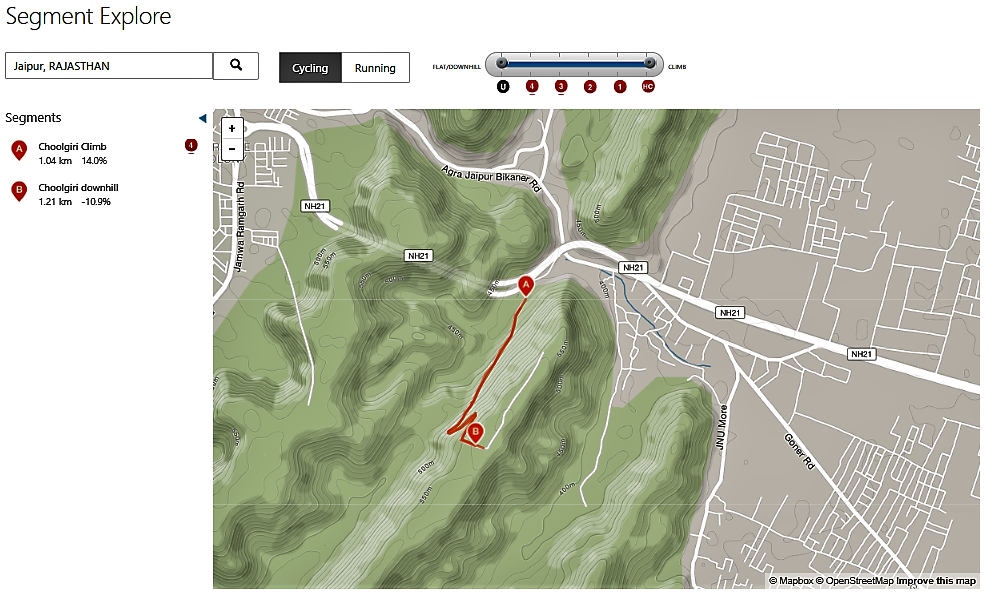
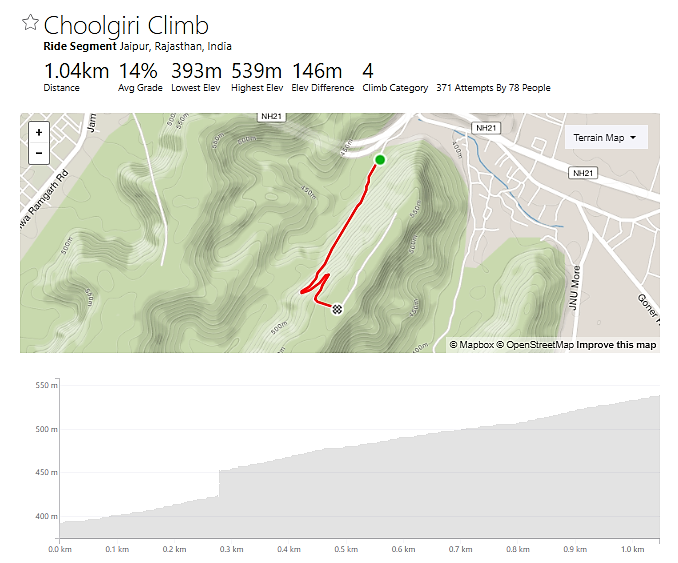
Now there are two segments on this hill. The Chulgiri climb and the  Chulgiri downhill.

Chulgiri Digamber Jain Temple STRAVA Segments
STRAVA SEGMENTS

I am also including specific details for these two segments, so the professional riders are aware of more specific terrain details.

Chulgiri Climb

Strava Segment - Chulgiri Climb
Strava Segment – Chulgiri Climb

Chulgiri Downhill

Strava Segment - Chulgiri Downhill
Strava Segment – Chulgiri Downhill

Inside Chulgiri Digamber Jain Temple

Chulgiri Digamber Jain Temple

Now let me tell you the temple is beautiful.

Surrounded by Aravali hills, this place is literally door to heaven during the morning. In the year 1953 is entitled as the start of the Jain sanctuary on the slopes of Aravalli. Jain Acharya Shri Desh Bhoosan Ji Maharaj picked the Aravalli slopes for building the Jain sanctuary and named the slopes as ‘Chulgiri’ Building the Jain sanctuary in the Aravalli slopes was the best test before Jain Acharya Ji, yet as is commonly said, nothing can be fixed if the soul is valid.

“Note: In case you are wondering how did I manage to get the images for this place clicked, these images are from my previous trips when the picture clicking culture was still there”

Some More Vital Information

I did manage to extract some more information which was a little too internal for someone who wants to visit this place.

Nearby Main city: Jaipur city, approximately 6 km.

Contact Numbers: 0141-2170773, 5171100

Major Event: Annual Gathering on 28th May.

Temple Info: This Kshetra is located on the hill, with 1000 steps. Vehicles can reach the top after a 4km climb. Google Map shows the exact location of the temple, off Jaipur Agra Road, 11kms from Jaipur.

Management: Trust: Shri Digambar Jain Atishay Shetra, Parshwanath, Chulgiri Prabandh Samiti. President: Shri Sumerchandra Soni (0141 2372689) Trustee: Dr. Subhashchandra Kala (0141 – 2603251) Organizer: Shri Mahendra Kumar Shah (094131 – 57255)

Chulgiri Digamber Jain Temple On My Youtube Channel

I made a lot of videos before, some raw some edited. These days it is very difficult to make videos or click pictures as the security is too tough, for some not very logical reasons. However not commenting anything on it though. However, I made a video of my past Chulgiri trip which was uploaded to my YouTube Channel. Watch here and share if you like.

Hope there are few good things that you may have picked from this article. In case you think I have missed something out, please let me know in the comments below.

Leave the comments and I will try to get back to you ASAP.

Happy cycling!

Check out the cycling clubs in Jaipur city.

Amazon! Mentioning top travel books on Amazon.